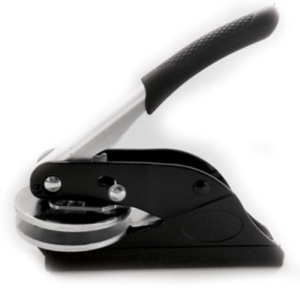
Custom Embossed seals give your product or correspondence an elegant appearance while also adding significant value and class. However, when it comes to their creation, things can go horribly wrong very quickly. Keep these considerations in mind when creating your custom embosser. As a general rule, you should always design your stamp at the same size as the actual stamp.
 You can be sure that your designs will translate well to the final product if you do this. For best results, print your design in its entirety. If something on your printout appears thin and difficult to read, it will not emboss properly.
Create a black-and-white version of your seal:
The most creative way to use the custom embosser stamp, use white. Remember that embossed areas cannot be inked. All areas that will be inked should be represented by the colour black (these areas will be flat). Black and white is the best colour scheme for your seal because it is most commonly printed in one colour. The final result will be easier to visualise if you design in black and white.
The Design:
The design of the custom embosser stamp should be kept simple. To a certain extent, embossed foil seals are limited in their ability to produce fine detail. On embossed foil, a complex design does not always work. The better the embossing, the less complicated the design.
The rules for embossing:
Ensure that all text is at least 7pt in size. As a general rule, 7pt is the minimum size for embossing; some companies can go as low as 6pt. Using a font size smaller than the minimum recommended size will not guarantee that the text will be readable. If the font is bold enough, it will emboss better.
It is safe to assume that embossed text that appears to be squished together on your monitor will do the same thing. Use at least 1pt thick strokes. Embossing will be poor if the line is too thin. Your design will emboss better if the lines are thicker.
Papers that can be embossed include:
Most embossed logos work well with papers up to 25 lb. When the film gets thicker, problems arise, such as blurring and loss of detail. A good rule of thumb is that the thicker the paper, the bolder the embossed logo should be. Using an embosser on thicker paper can be tricky, but there are a few tricks.

Double-pumping the embosser is an option. You can also use a perfume bottle filled with water as a makeshift syringe. About 10 minutes before embossing, lightly mist both sides of the paper. As a result, the embossing image on the paper has been improved. You can emboss even thin card stock using this method.
Your Logo’s Re-solvency
The quality of the artwork is also a major concern. You must have a resolution of at least 300 dpi in order to become an embosser. Printing your logo at an embosser-sized scale on your computer printer will reveal the truth. Your logo can serve as an embosser if the artwork’s edges are smooth or nearly smooth.
Using your logo as an embosser will be impossible if the edges are ragged. The custom rubber stamps can also tell you how many more rubber stamps you’ll need in the future to keep up with this vital supply.
Conclusion:
The custom rubber stamps are also helpful in knowing how much more rubber stamps you’ll need in the future to stay on top of this crucial supply. This is something that no office should be without.
Stamp Store offers custom rubber stamps that are reliable, high quality, and offer a seamless customization process; you won’t believe how easy it is to find something that perfectly fits your needs.
